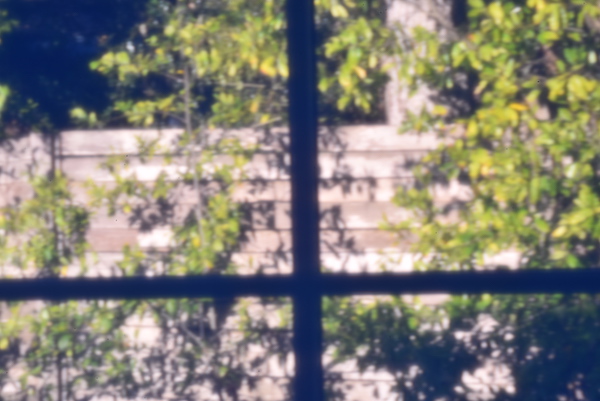
View of Back Yard using Pinhole Lens
| Back to October 12 | October 13, 2018 | On to October 24 |
This is the view from my dining room table to the backyard, taken with a pinhole lens on a digital camera.
View of Back Yard using Pinhole Lens
A neighbor asked about pinhole cameras, a project I used to teach photography in middle and high school.
My first pinhole camera was a milk carton all taped up with a piece of aluminum foil at the front and a 'film' holder in the back that kept a piece of photographic paper in place. The 'lens' was a tiny pinhole in the foil. My 'shutter' was a piece of tape covering the lens. I would load the paper in the dark room, take a 15 second exposure, go back to the dark room and develop the paper to produce a negative image. That would be contact printed to another sheet to produce the pictures.
I thought there might be a way to use my DSLR camera to simplify the process. I could use its digital sensor in place of the film, I just needed to make a lens.
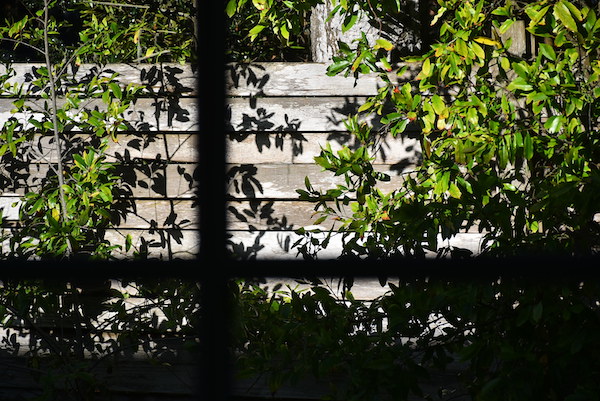
Back Yard using Nikkor Lens at 95mm
- For comparison, I attached my Nikkor lens and tried to duplicate the field of view. At about 95mm I had the window frame and trees appoximately the same size.
With my milk-carton camera I would compose the picture by pointing it towards the subject, put a heavy book on top to hold it steady, then open/close my shutter made of tape, guessing how long to keep it open. A digital camera makes it very easy to get framing and exposure correct.
I made my pinhole lens by attaching a piece of heavy duty foil over the end of an extension tube. A rubber band holds the foil in place.
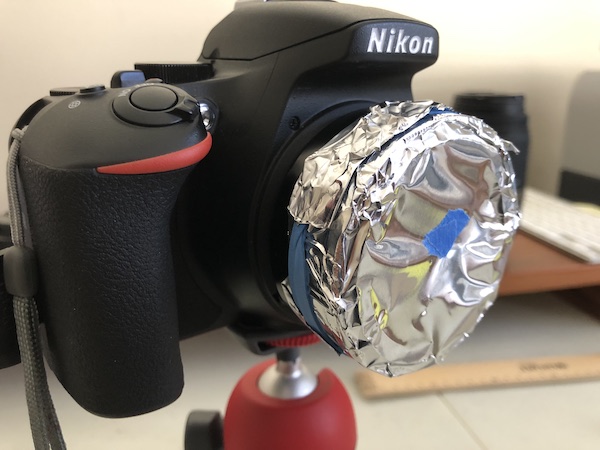
Pinhole Lens
The first hole I poked was too large (push pin tip) and the pictures were very blurry. I covered that one with blue tape. The second hole was much smaller and focuses better.
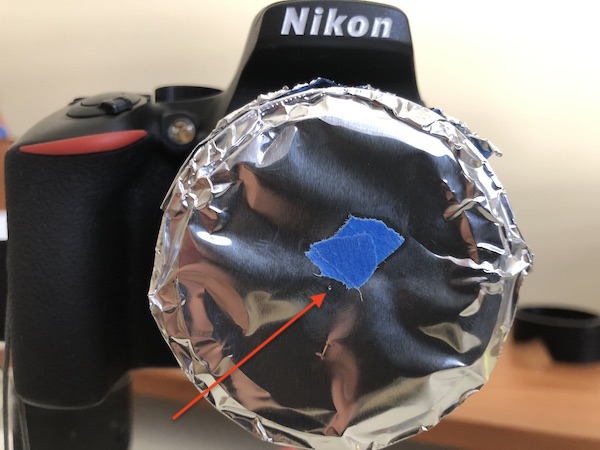
Arrow pointing to pinhole.
With a DSLR I could use the camera LCD to preview and compose the picture. I experimented with shutter speeds and ISO setttings, getting instant feedback from the camera. It even has a histogram to help with exposure!
For the backyard in sunlight, I settled at ISO 800 and a 1 second exposure, camera on a tripod and using the self-timer to avoid camera shake.
This was a fun afternoon project and I now have another lens in my arsenal. I'll post more pictures as I refine my techniques. Meanwhile, here's some links:
| Back to October 12 | rudy@rugebregt.com | On to October 24 |